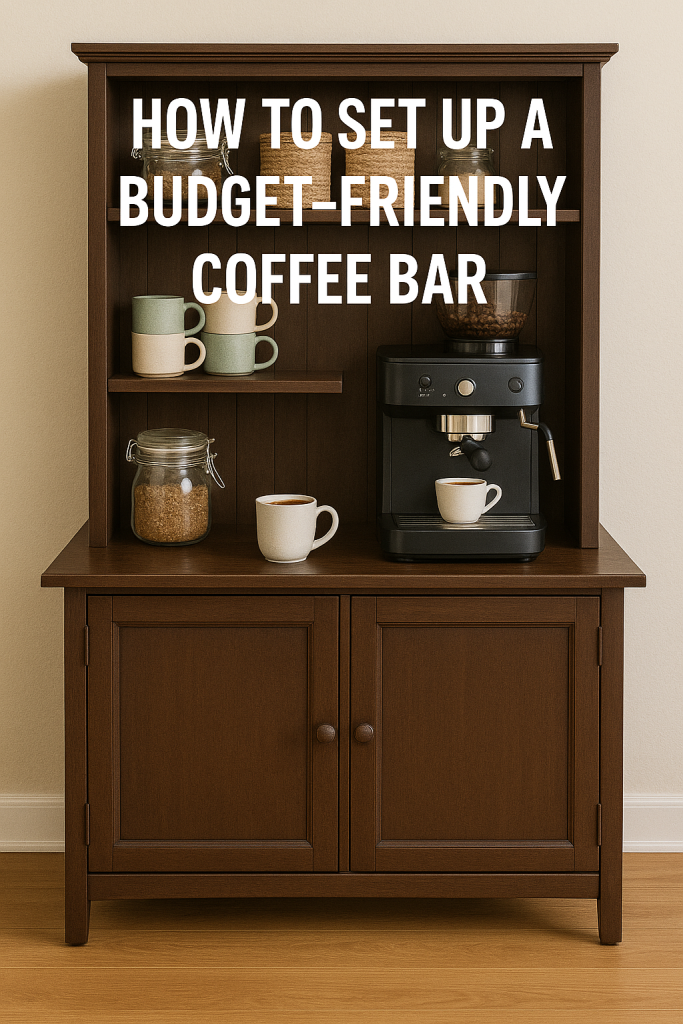
Creating a budget-friendly home coffee bar is an excellent way to enjoy café-quality beverages without leaving the comfort of your home. By thoughtfully selecting furniture and accessories, you can design a functional and stylish coffee station that suits your space and budget. Here’s a guide to help you set up your home coffee bar, featuring top-rated and best-selling items available on Amazon.
Essential Components of a Home Coffee Bar
To establish a comprehensive coffee bar, consider incorporating the following elements:
Coffee Maker or Espresso Machine – The centerpiece of your coffee bar. Choose a machine that aligns with your preferred brewing method and budget.
Coffee Grinder – Freshly ground beans significantly enhance the flavor of your coffee.
Storage Solutions – Organize your coffee essentials with cabinets, shelves, or carts.
Accessories – Include items like milk frothers, measuring spoons, and a sugar bowl for a complete setup.
Mugs and Cups – Have a selection of your favorite mugs readily available.
Decorative Touches – Personalize your space with plants, artwork, or decorative signs.
Top Budget-Friendly Coffee Bar Furniture and Accessories on Amazon
Here are some highly-rated and best-selling items to consider for your home coffee bar:
Disclosure: As an Amazon Associate I earn from qualifying purchases. This post may contain affiliate links.
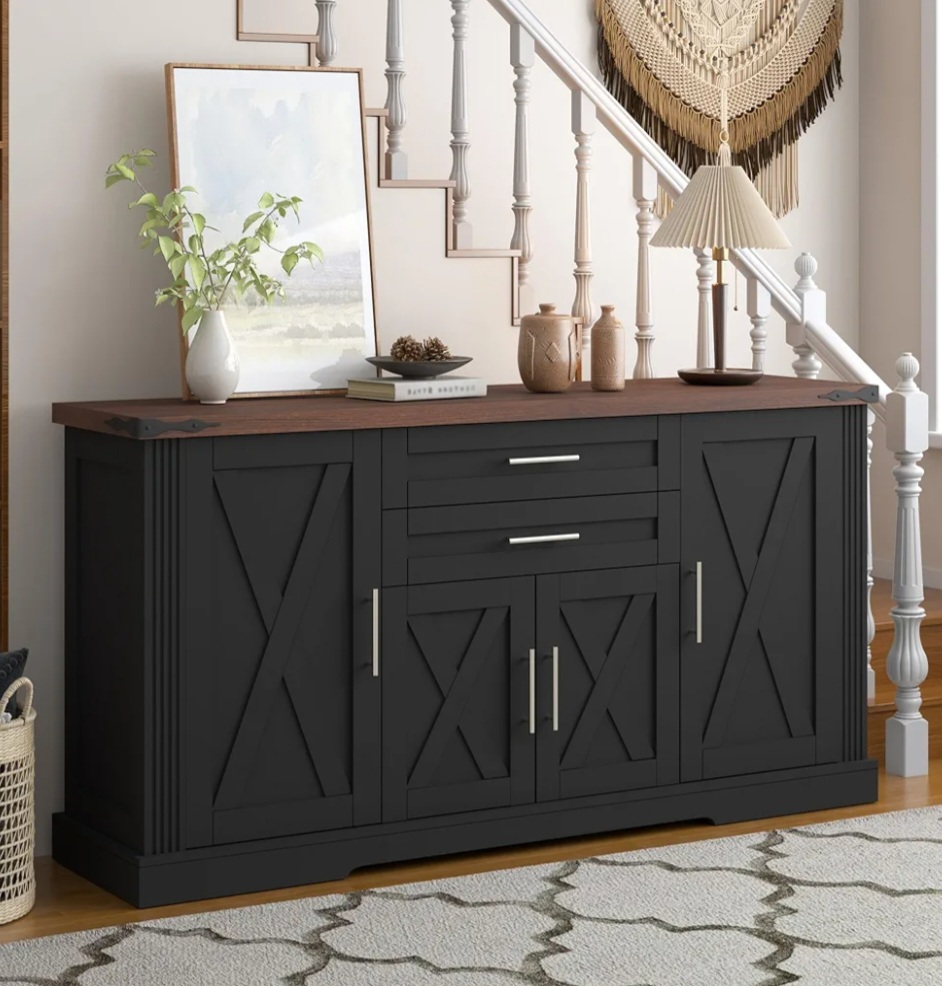
This large 55-inch cabinet offers a mix of industrial and rustic charm with a walnut brown finish and black steel frame. It features a spacious countertop, wine rack, open shelving, and concealed storage. Ideal for storing appliances, mugs, and bar tools.
Construction: MDF and powder-coated steel Color Options: Walnut Brown with Black Frame
Perfect for tighter spaces, this compact cabinet offers a rustic oak finish and metal frame. Two doors conceal shelving space, while the top offers room for coffee makers or decor. Great for farmhouse or rustic interiors.
Construction: Wood veneer over MDF and steel frame Color Options: Rustic Oak
This multifunctional sideboard features adjustable shelves, cabinet doors, and a spacious counter for appliances. Designed to work well as a buffet, console table, or dedicated coffee bar.
Construction: P2 MDF board Color Options: Rustic Brown, Gray Wash
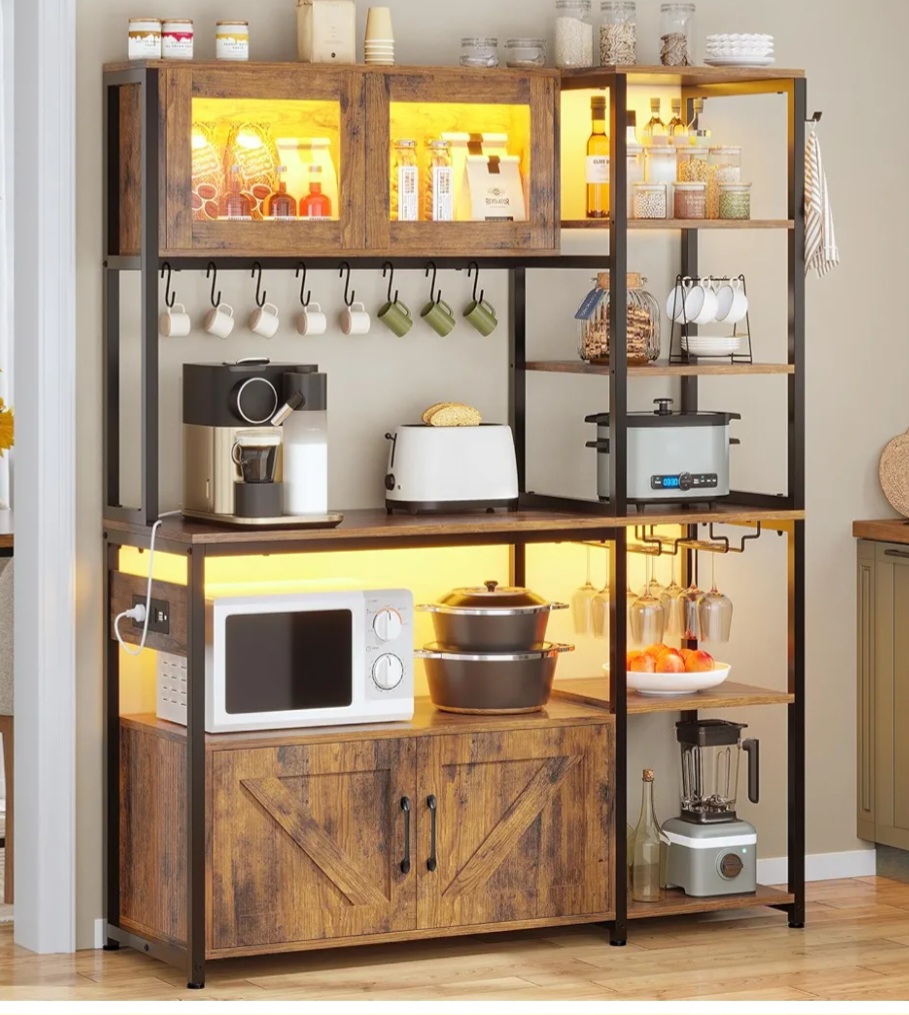
Loaded with features, this baker’s rack-style unit includes LED lights, a power outlet, wine rack, hooks, and six tiers for maximum storage. A true all-in-one station.
Construction: Engineered wood and steel Color Options: Rustic Brown with Black Frame
This stylish baker’s rack includes a pull-out wire basket, multiple shelves, and a built-in charging station for convenience. Rustic wood tones meet modern practicality.
Construction: Particleboard and steel Color Options: Rustic Brown with Black Frame
Pros:
Charging station for appliances
Compact but well organized
Great balance of form and function
Cons:
Not suited for large equipment
Basket isn’t very deep
Recommended Accessories
Fellow Atmos Coffee Canister – Keeps your beans fresh longer.
Milk Frother (PowerLix or Zulay) – Perfect for making lattes or cappuccinos.
Espresso Knock Box – Keeps your cleanup neat and efficient.
Digital Coffee Scale – Helps you dial in precise measurements.
Wall Hooks or Mug Rack – Adds storage and style to your coffee bar.
Final Thoughts
A home coffee bar doesn’t have to be expensive to be effective or stylish. With the right mix of furniture, tools, and decor, you can build a space that enhances your morning routine without emptying your wallet. Use these Amazon finds to get started on building your perfect budget-friendly coffee nook today.
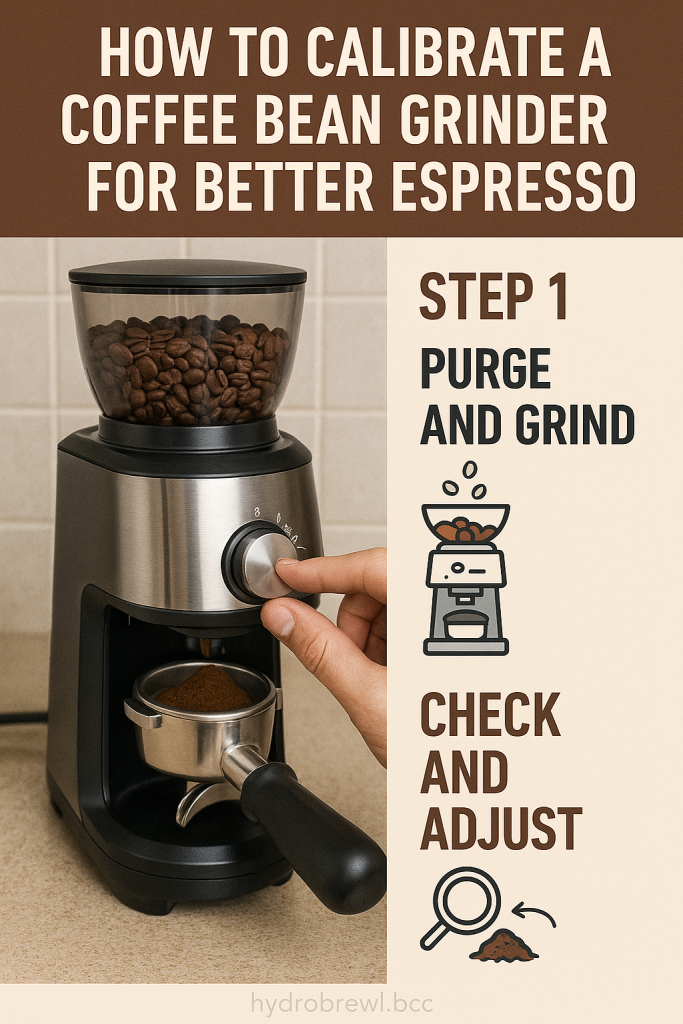
Dialing in your coffee bean grinder is one of the most important steps in making excellent espresso. Unlike drip coffee, espresso is incredibly sensitive to grind size, dose, and distribution. Even small changes can mean the difference between a sour shot and a perfectly balanced espresso. Calibrating your coffee bean grinder ensures consistency, flavor, and crema in every cup.
In this guide, we’ll walk through how to properly calibrate your coffee bean grinder for espresso, including the tools you need, how to assess grind size, and how to make precise adjustments.
Why Grinder Calibration Matters
Espresso requires a fine, even grind to extract correctly under high pressure. If the grind is too coarse, water flows too quickly, resulting in under-extraction and sour flavors. If the grind is too fine, it can choke the machine or create bitter, over-extracted shots.
Proper calibration ensures:
Consistent grind size
Ideal extraction time (25–30 seconds)
Balanced flavor and body
Stable crema
Minimal channeling or clogs
A well-calibrated coffee bean grinder is the foundation of any high-quality espresso routine.
Step 1: Start with Fresh Beans and a Clean Grinder
Before calibrating, clean your grinder and start with fresh, medium to dark roasted beans:
Use beans roasted within the past 2–4 weeks.
Avoid oily beans that can gum up the burrs.
Empty old grounds from the chamber and clean the burrs with a brush or vacuum.
Clean equipment ensures your adjustments reflect real changes in grind size—not residual buildup or stale grounds.
Step 2: Understand Your Grinder Settings
Most espresso grinders fall into two categories:
Stepped Grinders: Use preset clicks or notches to adjust grind size.
Stepless Grinders: Allow for continuous adjustment, offering more precision.
Familiarize yourself with your grinder’s controls and how to adjust finer vs. coarser:
Turning the dial toward “fine” will slow the shot and increase resistance.
Turning the dial toward “coarse” will speed up the shot and reduce resistance.
Mark your starting point with a piece of tape or marker for easy reference during calibration.
Step 3: Dial In Your Grind Size
This is where the real calibration begins. You’ll be pulling test shots and adjusting based on extraction time and visual cues.
Pull a Test Shot
Weigh out 18–20g of coffee (depending on your basket).
Tamp consistently and evenly.
Start your shot and time the extraction.
Analyze the Shot
If the shot finishes in under 20 seconds, the grind is too coarse.
If the shot takes longer than 35 seconds, the grind is too fine.
Aim for a 25–30 second shot time for double espresso (36–40g yield).
Adjust and Repeat
If too fast: adjust finer in small increments.
If too slow: adjust coarser.
Let the grinder run for a few seconds after each change to purge the old grind.
Step 4: Evaluate Taste and Texture
Don’t rely on timing alone—taste your espresso.
Sour? Under-extracted, likely too coarse.
Bitter? Over-extracted, likely too fine.
Flat or dull? Could be stale beans, uneven tamp, or incorrect dose.
A great espresso should be sweet, balanced, and full-bodied with a golden crema.
Step 5: Lock in Your Settings and Monitor Consistency
Once you’ve found the sweet spot:
Take note of your grind setting, dose, and yield.
Use a notepad or app to track changes when switching beans.
Calibrate again when you get new beans or notice a drop in shot quality.
Environmental factors like humidity and temperature can also affect grind behavior—especially with fresh beans—so small tweaks may be needed.
Final Tips for Grinder Calibration
Purge between adjustments: Always run the grinder for a few seconds after changing settings to avoid mixing grinds.
Use a scale and timer: Precision matters when calibrating—consistency is key.
Warm up your machine: Pull a few blank shots before testing to stabilize temperature.
Keep your grinder clean: Monthly cleaning with grinder-safe pellets or a dry brush helps maintain accuracy.
Recalibrate for new beans: Each roast behaves differently. Start over when switching to a new origin or roast profile.
With careful calibration, your coffee bean grinder becomes a tool of precision and power—one that helps you unlock the best flavors your beans have to offer. Once you’ve dialed it in, you’re on the path to espresso excellence.
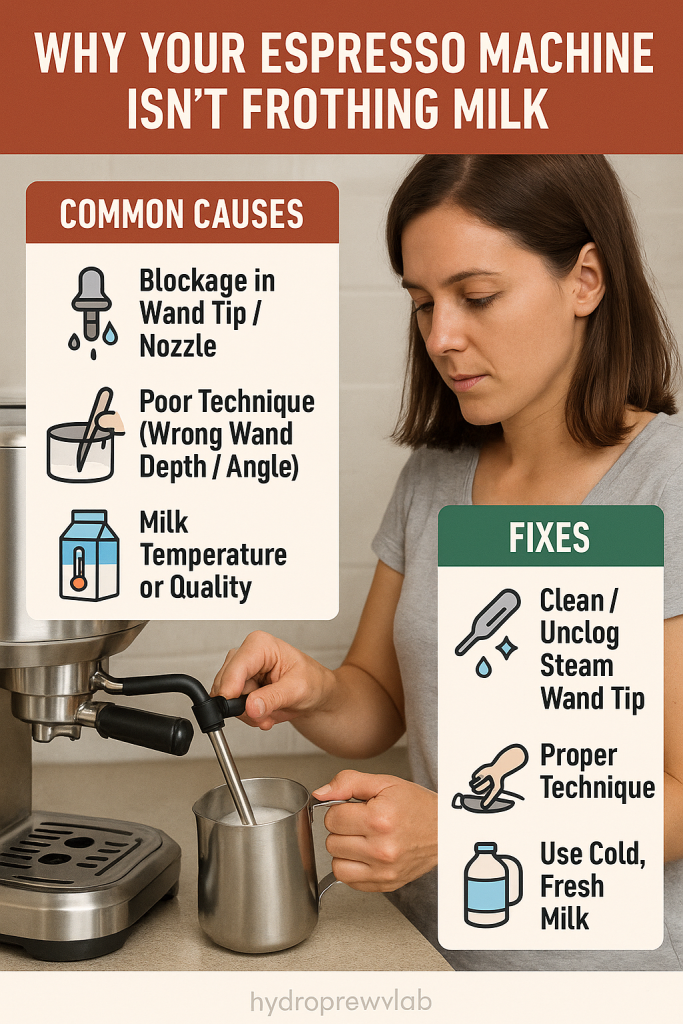
Steaming milk to a creamy, velvety texture is an essential part of making lattes, cappuccinos, and flat whites. But what happens when your espresso machine isn’t frothing milk properly? Whether you’re getting large bubbles, no foam at all, or the steam wand doesn’t work, milk frothing problems can turn your café-quality dreams into a frustrating mess.
This guide explores the most common reasons your espresso machine might not be frothing milk—and how to fix them.
1. The Steam Wand Is Clogged or Dirty
Milk residue can dry inside the steam wand and block steam flow, especially if the wand isn’t cleaned immediately after each use.
Symptoms:
No steam or weak steam pressure
Sputtering steam
Buildup or burnt milk odor on the wand
Fixes:
Soak the steam wand in a cup of warm water with a splash of vinegar or milk cleaner for 10–15 minutes.
Use a pin or steam wand cleaning brush to clear the tip holes.
After soaking, purge the wand by turning on steam for 3–5 seconds.
Pro Tip: Always wipe the wand immediately after steaming and purge it before and after each use to prevent buildup.
2. Your Machine Isn’t Reaching Proper Temperature or Pressure
Milk needs high-temperature steam and adequate pressure to froth properly. If the boiler isn’t getting hot enough or pressure is low, the wand won’t aerate milk correctly.
Symptoms:
Steam is cool or not forceful enough
No froth formation, just warm milk
Fixes:
Let your machine fully heat up before steaming. Some machines take 5–10 minutes to reach proper steam temperature.
Check your pressure gauge (if available). Most machines need 1.2–1.5 bars for effective steaming.
If it’s still weak, descale your machine. Mineral buildup can affect temperature and pressure control.
3. You’re Using the Wrong Type of Milk
Not all milk froths equally. The type and temperature of milk significantly impact foam texture and stability.
Best Milks for Frothing:
Whole Milk: Best for creamy, stable foam
2% Milk: Froths well but with less creaminess
Oat Milk (Barista Blend): Excellent for frothing with neutral flavor
Soy Milk (Barista Blend): Good microfoam, but can be temperature-sensitive
Tips:
Always use cold milk straight from the fridge (38–40°F).
Avoid ultra-pasteurized or long-shelf-life milk, which doesn’t foam well.
Don’t re-steam milk—use fresh milk for each drink.
4. Poor Frothing Technique
Technique matters. Even with the best milk and machine, poor wand positioning or steaming time will ruin foam.
Common Mistakes:
Keeping the wand too deep in the milk
Holding the wand too close to the surface without enough tilt
Steaming too long (overheating milk)
Fixes:
Submerge the tip just below the surface to incorporate air for the first 5 seconds.
Tilt the pitcher slightly to create a whirlpool motion.
Once the milk reaches 100°F (hand-warm), submerge the wand deeper to heat it to 140–150°F.
Stop steaming when the pitcher becomes too hot to touch for more than 2–3 seconds.
5. Your Machine Isn’t Designed for Good Frothing
Entry-level or capsule espresso machines often have weak steam wands that can’t generate the pressure needed for microfoam.
Symptoms:
Steam output is consistent but weak
Foam is bubbly and inconsistent
What You Can Do:
Upgrade to a machine with a more powerful steam boiler or thermoblock.
Consider a standalone milk frother as an alternative.
Some machines have a pannarello wand (auto-frother)—try removing the sleeve for better manual control.
Final Tips for Better Milk Frothing
Always start with cold milk in a cold pitcher.
Use a stainless steel milk jug with a tapered spout for better pouring control.
Practice your timing—most frothing should be complete in 20–30 seconds.
Wipe and purge your steam wand religiously.
If your espresso machine isn’t frothing milk the way you want, don’t give up. With the right maintenance, technique, and a little practice, you’ll be swirling latte art-worthy microfoam in no time.
Pulling the perfect shot of espresso is a satisfying blend of science and art. But even the most skilled baristas encounter issues from time to time. Whether your espresso tastes bitter, flows too fast, or lacks crema, small variables can throw everything off. This comprehensive troubleshooting guide is here to help you diagnose and solve the most common espresso-making problems.
Understanding the Variables of Espresso
Before jumping into specific issues, it’s important to recognize that espresso relies on several interconnected variables:
Grind size – The fineness of your grind determines how fast or slow the water passes through the coffee puck.
Dose (amount of coffee) – Too much or too little coffee impacts extraction and balance.
Tamping pressure – Uneven or inconsistent tamping can cause channeling and uneven flavor.
Water temperature – Water that’s too hot or too cool will extract flavors incorrectly.
Extraction time – The shot should typically last between 25–30 seconds for ideal results.
Machine cleanliness and maintenance – Dirty machines affect pressure, temperature, and taste.
Mastering these variables gives you the ability to troubleshoot nearly any espresso-related problem.
Taste Issues
Bitter Espresso
Bitterness is often a sign of over-extraction. It means the water spent too much time in contact with the coffee, pulling out undesirable flavors like tannins.
Solutions:
Use a slightly coarser grind to speed up extraction.
Decrease brew time—stop the shot between 25 and 30 seconds.
Make sure water temperature doesn’t exceed 205°F.
Deep-clean your machine, especially the group head and portafilter, to remove old coffee residue.
Sour Espresso
Sour flavors come from under-extraction. This happens when the water passes through the puck too quickly, leaving behind the sweet, full-bodied notes.
Solutions:
Try a finer grind to slow the water flow.
Increase the dose slightly to increase contact time.
Confirm your water temperature is above 195°F.
Use fresh, medium-roast beans for a more balanced shot.
Bland or Watery Espresso
A watery or flavorless shot may feel hollow in the mouth and lack body or richness.
Solutions:
Increase your dose by 1–2 grams.
Ensure an even, firm tamp with about 30 lbs of pressure.
Verify your beans are freshly roasted and properly stored.
Try using a finer grind to increase extraction time.
Technical and Flow Issues
Channeling (Uneven Extraction)
Channeling happens when water finds weak spots in the puck and flows through unevenly. This creates over- and under-extracted zones in the same shot.
Solutions:
Level your coffee bed before tamping using a distribution tool or finger sweep.
Apply consistent tamping pressure.
Check for puck fractures or uneven sides after tamping.
Replace damaged or worn portafilter baskets.
Espresso Coming Out Too Fast
This results in weak, sour, or under-extracted espresso.
Solutions:
Adjust to a finer grind to slow water flow.
Use a higher coffee dose.
Tamp more firmly and consistently.
Espresso Coming Out Too Slow or Not at All
When water can’t pass through, it usually means the puck is too compact or the grind is too fine.
Solutions:
Use a coarser grind.
Decrease your dose slightly.
Check for clogs in the shower screen or group head.
Clean your machine thoroughly.
Crema Issues
No Crema
No crema usually means stale beans or insufficient pressure.
Solutions:
Use fresh beans, ideally within 2–3 weeks of roast date.
Verify your machine builds up enough pressure (at least 9 bars).
Make sure your machine and portafilter are clean and dry.
Thin or Rapidly Dissipating Crema
Crema should be thick, golden, and hold for at least 30 seconds.
Solutions:
Improve tamping consistency and dose.
Verify machine pressure and water temperature.
Avoid beans that are overly oily or too darkly roasted.
Temperature and Machine Issues
Lukewarm Espresso
Low-temperature espresso can flatten flavor and dull crema.
Solutions:
Always preheat your machine and portafilter.
Use a digital thermometer to check your brew water.
Rinse your cup with hot water before brewing.
Steam Wand Not Frothing Milk Well
Frothing problems usually stem from milk type, pressure issues, or a clogged wand.
Solutions:
Use cold whole milk for best microfoam.
Soak the steam wand in warm water and vinegar to clear blockages.
Ensure your machine reaches steam-ready temperature.
Purge the wand before and after every use.
Espresso Troubleshooting Table
Symptom
Possible Cause
Solution(s)
Bitter taste
Over-extraction, water too hot
Use coarser grind, lower brew temp, clean machine
Sour taste
Under-extraction
Use finer grind, increase brew time
Watery or bland shot
Under-dosed, grind too coarse
Increase dose, use finer grind
No crema
Stale beans, low pressure, dirty machine
Use fresh beans, check pressure, clean group head
Thin crema
Under-extraction, poor tamp
Adjust grind and tamp, use fresh beans
Fast flow
Grind too coarse, under-dosed
Use finer grind, increase dose
Slow or no flow
Grind too fine, over-tamped
Use coarser grind, reduce tamp/dose
Channeling
Uneven tamp or coffee bed
Distribute grounds evenly, tamp level
Lukewarm espresso
Machine not preheated
Preheat machine, use warm cups
Milk won’t froth
Blocked wand, low pressure
Clean wand, purge before/after, use whole milk
Final Thoughts
Espresso troubleshooting is part of the learning curve—and even seasoned baristas still tweak their technique. The good news is that every espresso issue has a solution, often with just a minor adjustment to your grind, dose, tamp, or temperature. Keep a log of your shots, note changes, and don’t be afraid to experiment.
Remember that clean, well-maintained equipment is just as important as good technique. Consistent cleaning, using fresh beans, and practicing your workflow will set you up for success. With time, patience, and the tips in this guide, you’ll be pulling beautifully balanced espresso in no time.
To keep your espresso machine in top shape and your coffee tasting great, cleaning it regularly is essential. But not all cleaning methods are the same. Two of the most important maintenance tasks—descaling and backflushing—are often misunderstood or used interchangeably. In reality, they serve different purposes and are required at different intervals. In this guide, we’ll break down the key differences between descaling and backflushing, why both are necessary, and how to do them correctly.
What Is Descaling?
Purpose of Descaling
Descaling removes mineral deposits (primarily calcium and magnesium) that build up inside your espresso machine’s internal components due to hard water. Over time, these deposits can clog water lines, reduce heating efficiency, and damage internal parts like boilers and pumps.
When to Descale
Most manufacturers recommend descaling every 1 to 3 months, depending on your water hardness and usage frequency. If you use filtered or softened water, you can usually go longer between descalings. Signs you need to descale include slower brewing times, reduced water flow, or a noticeable change in taste.
How to Descale
Mix a descaling solution (either a commercial product or 1:1 white vinegar and water).
Fill the water reservoir with the solution.
Run a brew cycle halfway, let it sit for 15–20 minutes, then complete the cycle.
Rinse by running 2–3 cycles of clean water.
What Is Backflushing?
Purpose of Backflushing
Backflushing removes coffee oils, grounds, and residue that build up behind the group head screen in semi-automatic and manual espresso machines. This cleaning method targets the brew path, not the internal boiler system.
When to Backflush
Backflushing with water should be done every day or every other day if you’re using the machine heavily. A chemical backflush with espresso machine cleaner should be done weekly to deep clean the brew path.
How to Backflush
Insert a blind filter (backflush disk) into the portafilter.
Add a small amount of backflush detergent.
Lock the portafilter into the group head and run the pump for 10 seconds.
Stop and wait for 5–10 seconds; repeat 5–6 times.
Rinse thoroughly with water-only backflush cycles.
Key Differences Between Descaling and Backflushing
Feature
Descaling
Backflushing
Targets
Internal pipes, boiler, water lines
Group head, solenoid valve
Frequency
Every 1–3 months
Daily (water) / Weekly (chemical)
Cleaning Solution
Vinegar or commercial descaler
Espresso machine detergent
Suitable For
All espresso machines
Machines with 3-way solenoid valves
Prevents
Scale buildup, water flow issues
Bitterness, clogs, taste degradation
Do You Need to Do Both?
Yes—descaling and backflushing are complementary. Descaling addresses mineral buildup inside the water system, while backflushing cleans the coffee residue from the brew path. Skipping either can reduce performance, shorten your machine’s lifespan, and negatively impact flavor.
If your espresso machine doesn’t have a 3-way solenoid valve (common in some super-automatics), it may not support traditional backflushing. In that case, consult your user manual for cleaning protocols.
Final Tips for Better Maintenance
Always refer to your machine’s user manual before using cleaning products.
Use filtered or softened water to reduce mineral buildup.
Keep a cleaning log to track when you descale and backflush.
By understanding the difference between descaling and backflushing—and when to do each—you’ll keep your espresso machine running smoothly and your shots tasting consistently great.
Cleaning your espresso machine is essential for maintaining flavor, extending the life of your equipment, and ensuring every shot pulls perfectly. Whether you’re working with a semi-automatic, fully automatic, or manual espresso machine, regular cleaning keeps oils, grounds, and hard water deposits from ruining your coffee. In this guide, we’ll walk through how to clean your espresso machine thoroughly—with vinegar and other effective methods.
Daily Cleaning: Small Steps That Make a Big Difference
Rinse the Group Head and Portafilter
After each use, run water through the group head to remove any remaining coffee grounds. Detach the portafilter, knock out the puck, rinse it with warm water, and wipe it dry. This prevents buildup and stale coffee residue.
Wipe the Steam Wand
Steam wands can quickly become clogged with milk residue. Immediately after steaming milk, purge the wand by turning it on for 2-3 seconds, then wipe with a damp cloth. For dried milk, soak the tip in warm water for 10–15 minutes and scrub with a steam wand brush.
Empty and Rinse the Drip Tray and Waste Bin
Espresso machines with internal bins or drip trays should be emptied and rinsed daily. These components can harbor mold or bacteria if neglected. Use mild soap and warm water, then dry completely before reinserting.
Weekly Cleaning: Deep Cleaning Key Components
Backflushing the Group Head
If your espresso machine supports it, use a blind filter basket and backflush with water daily and with espresso machine cleaner weekly. This clears out oils and residue behind the group screen. Follow your machine’s backflushing instructions.
Soaking the Portafilter and Baskets
Once a week, soak metal parts like the portafilter and filter baskets in a solution of warm water and espresso cleaner or a mix of vinegar and baking soda. Rinse thoroughly before use.
Cleaning the Water Reservoir
Remove the water tank, empty any stagnant water, and clean with mild dish soap. For added sanitization, use a mixture of 1 part vinegar to 3 parts water, let sit for 15 minutes, then rinse well.
Monthly Maintenance: Descaling and Sanitizing
Descaling with Vinegar or a Descaler
Hard water causes mineral buildup in the internal boiler and pipes. To descale:
Fill the reservoir with 1 part vinegar to 1 part water (or use a commercial descaler).
Run the brew cycle halfway, pause for 15 minutes, then resume.
Repeat the process with fresh water 2-3 times to flush out vinegar residue.
Sanitize the Steam Wand Internally
Fill a cup with water and a bit of vinegar, place the wand in it, and activate the steam function for several seconds. Repeat with plain water to rinse. This ensures internal milk residue is eliminated.
Inspect and Clean Seals and Gaskets
Use a soft brush or cloth to clean around seals, especially the group gasket. Inspect for cracks or hardening—these should be replaced as needed to prevent leaks and maintain pressure.
Pro Tips for Long-Term Espresso Machine Care
Use Filtered or Softened Water
Using filtered water minimizes the frequency of descaling and improves taste. Avoid distilled water, as it may interfere with sensors in some machines.
Create a Cleaning Schedule
Use a checklist or calendar to track daily, weekly, and monthly tasks. Regularity ensures you don’t forget critical steps, especially descaling.
Invest in Specialized Tools
A few small tools make cleaning much easier: backflush disk, steam wand brush, group head brush, and espresso-safe cleaners. Keeping them on hand encourages routine maintenance.
Conclusion
Keeping your espresso machine clean is more than just a chore—it’s a critical step toward consistently excellent coffee. From daily rinses and steam wand wipes to weekly deep cleans and monthly descaling, each task ensures that your machine runs efficiently and your drinks taste their best. Whether you rely on vinegar, specialized cleaners, or a bit of both, following a regular maintenance routine will keep your equipment in top condition.
By understanding your machine’s needs and creating a manageable cleaning schedule, you’ll not only extend its lifespan but also enjoy better-tasting espresso every time. With just a few minutes of upkeep each week, your machine can deliver café-quality results for years to come.
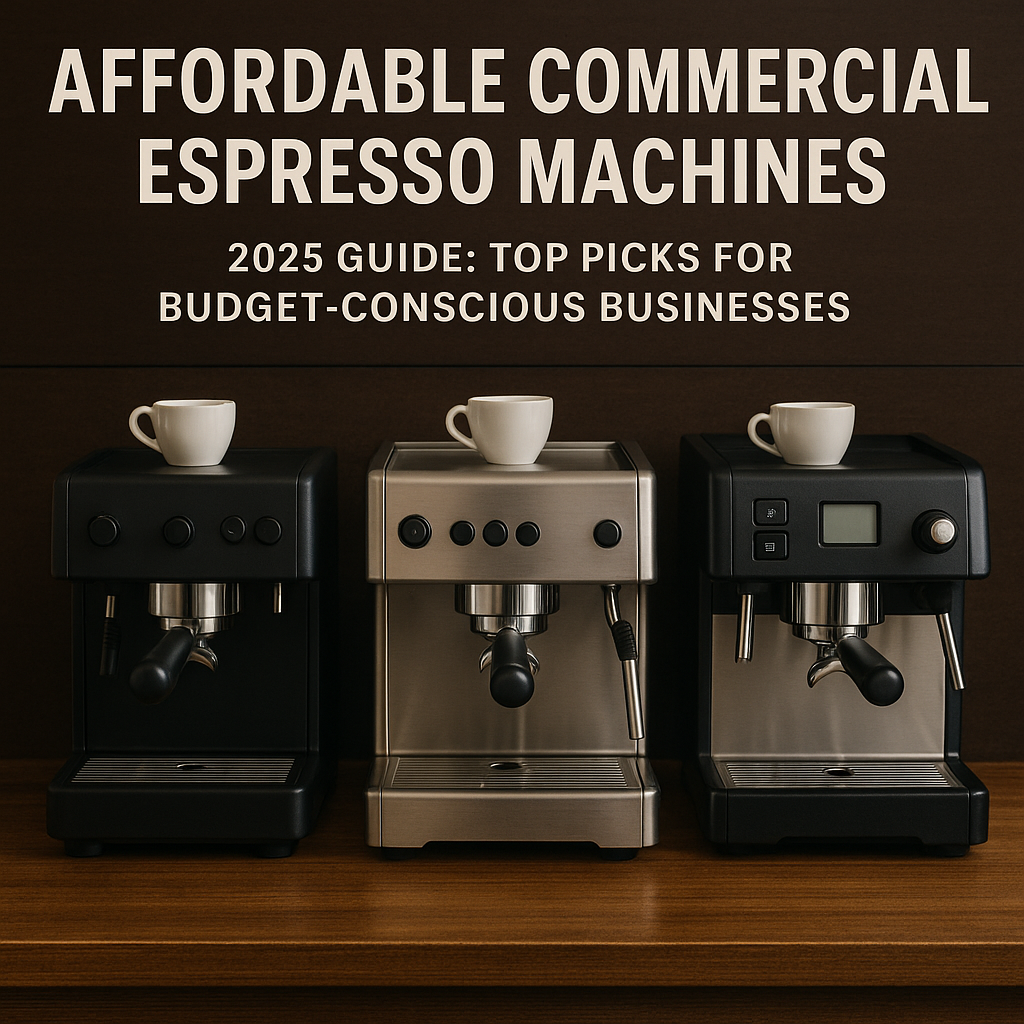
Finding the right affordable commercial espresso machine for your café, food truck, or office shouldn’t mean sacrificing quality. Whether you’re a startup shop or just looking to keep costs low without compromising on performance, there are several budget-friendly machines on Amazon that offer great value.
This guide breaks down the top-rated, cost-effective commercial espresso machines currently available. Each one includes key features, pros and cons, and the best use case—so you can find the perfect fit for your business.
🔍 What Makes an Espresso Machine “Affordable”?
Reasonable Price Without Compromising Quality
When we talk about an affordable commercial espresso machine, we’re not just referring to the lowest price tag. Affordability in the commercial space is all about value—balancing performance, reliability, and cost. The machines that fall into this category typically range from $1,000 to $4,000, which is considered modest in a market where high-end commercial units can exceed $10,000. At this price point, you can expect machines with dependable parts, sufficient power for moderate use, and essential barista features.
These espresso machines often skip the bells and whistles found in premium models—such as digital displays, dual pumps, or built-in milk carousels—but they still provide excellent espresso quality. Many of them are designed for semi-professional or light commercial use and are particularly attractive for startups, mobile coffee setups, boutique cafés, and offices with steady (but not overwhelming) coffee demand.
An affordable machine may not include advanced automation, but it will offer must-have functionality like consistent pressure, thermal stability, and strong steam output. You’ll want to focus on machines that balance ease of use and consistency while staying within your budget. Look for models with good manufacturer warranties and readily available replacement parts as part of your long-term value assessment. An affordable commercial espresso machine typically costs between $1,000–$4,000 and still delivers reliable brewing power and build quality.
Durability for Daily Use
Commercial environments demand much more from espresso machines than residential use. An affordable commercial espresso machine must be built to withstand the daily grind—literally and figuratively. Durability in this price range is usually a product of smart engineering and material selection. Most quality machines under $4,000 will use stainless steel housing, brass or copper components in boilers and group heads, and reinforced seals or solenoid valves for improved longevity.
You should avoid machines made with thin plastic or overly simplified components unless your usage will be very light. Entry-level commercial machines often borrow their internals from high-end home machines but beef up key elements to meet the demands of regular use. The most durable budget-friendly machines typically come from brands that also manufacture high-end units, ensuring that some of the same production quality and engineering make it into their more economical models.
If you’re using your machine in a café or a food truck, expect dozens or even hundreds of drinks per day. That means you need hardware that can maintain stable temperature and pressure for hours at a time without overheating or requiring constant adjustment. In this context, even a lower-cost machine needs to function like a tank. Well-built budget models may not look fancy, but they’re engineered for uptime—and that’s what matters most. It should feature stainless steel construction or similar commercial-grade materials designed to withstand regular use.
Feature Efficiency
One of the best ways manufacturers make an affordable commercial espresso machine is by being selective about features. Rather than packing every possible bell and whistle into a single model, budget machines often focus on core performance features: consistent brewing temperature, solid steam pressure, and easy-to-use controls. These essentials allow you to craft high-quality drinks without paying for advanced digital or automated systems.
You’ll find machines in this price range often feature manual or semi-automatic operation with basic volumetric control. Some may come with built-in grinders, while others are designed for use alongside standalone grinders. Either way, simplicity is a strength. Baristas can fine-tune their drinks and focus on craft, while operators benefit from lower maintenance and repair costs.
Efficiency doesn’t just apply to features—it also applies to workflow. A streamlined machine can help reduce drink prep time without overcomplicating training. Many affordable commercial machines include rapid heating systems, straightforward cleaning processes, and space-saving designs that help staff move quickly and efficiently. The end result? You get a machine that fits into your business flow without dominating your budget—or your countertop. These machines may skip advanced automation, but still offer critical features like volumetric dosing, steam wands, and dual boilers.
🧰 Essential Features in an Affordable Commercial Espresso Machine
Boiler Type: Single, Dual, or Heat Exchanger
Boiler configuration is one of the most important factors in determining the performance of an affordable commercial espresso machine. Single boiler machines are typically more compact and budget-friendly, but they can’t brew espresso and steam milk at the same time. This can slow down service during busy hours and may not be ideal for a café setting.
Heat exchanger systems, on the other hand, offer a middle ground. These machines allow simultaneous brewing and steaming by using a single boiler with a built-in tube that runs fresh water through it, heating it quickly. This design provides temperature stability and efficiency without the higher cost associated with dual boiler systems.
Dual boiler machines are the gold standard, offering precise temperature control for both brewing and steaming with separate, independently heated chambers. While they’re typically more expensive, some affordable options in this category exist, especially in the prosumer or light commercial tier. These are great for operations that need to serve several milk-based drinks in quick succession.
When shopping on a budget, opt for a heat exchanger if you anticipate moderate daily volume and want consistent results. Dual boilers are preferable if you can stretch your budget slightly or expect to steam and brew frequently during peak hours. Look for heat exchanger or dual boiler systems for the ability to steam milk and brew simultaneously—critical for speed.
Group Head Count
The number of group heads on an affordable commercial espresso machine directly impacts your drink output and workflow efficiency. Single-group machines are perfect for low-volume environments like offices, small cafés, and mobile setups. They take up less space and are easier to maintain, but you’re limited to one shot or drink at a time.
Two-group machines are more versatile, allowing baristas to pull multiple shots simultaneously. This can significantly increase productivity in settings with moderate customer traffic, such as coffee kiosks, bakeries, and small restaurants. While three-group machines are available, they’re rarely considered affordable and are best suited for high-volume cafés with multiple baristas.
Some machines even offer compact two-group configurations, which are a great compromise between size and output. Consider how many drinks you’ll need to serve per hour and match your group head count accordingly. Investing in one extra group may seem like a bigger expense upfront, but it can drastically reduce wait times and improve customer satisfaction in the long run. Most affordable options come with one or two group heads. Choose based on expected daily volume.
Manual vs. Automatic Controls
Control options on an affordable commercial espresso machine can vary widely, from classic lever machines to fully programmable dosing systems. Manual machines require the user to control water flow and pressure—either by pulling a lever or activating a pump manually. These are great for baristas who want complete control over the shot, but they also require more skill and training.
Semi-automatic machines automate the pump function but still require manual control over shot timing. These machines strike a balance between control and consistency, making them popular in budget-conscious commercial environments.
Automatic machines offer programmable volumetric dosing, allowing baristas to hit the same shot volume with the press of a button. This reduces the skill needed to produce consistent drinks and speeds up service. While super-automatic machines (which grind, dose, brew, and froth milk at the touch of a button) are typically more expensive, a few entry-level options fall into the affordable category.
The right control type depends on your staffing model and customer volume. If you expect new or untrained staff to operate the machine, an automatic or semi-automatic model is your best bet for reliable performance. Machines with programmable volumetric dosing are ideal at this price range, offering speed and consistency without the cost of super-automatics.
🛠 Maintenance & Setup Considerations
Ease of Cleaning
Keeping your machine clean is vital to espresso quality and long-term performance. A good affordable commercial espresso machine should feature user-friendly cleaning mechanisms that don’t require disassembly or complicated steps. Machines with removable drip trays, accessible group heads, and simple steam wand designs make daily cleaning more manageable.
Some machines even offer automatic cleaning cycles or backflush programs, which are huge time-savers. If your machine doesn’t have this feature, make sure you’re comfortable performing a manual backflush using a blind portafilter and cleaning solution. Steam wands should be purged after every use and wiped clean to avoid milk buildup.
Also consider the material of the drip tray and water tank—stainless steel trays are more hygienic and last longer than plastic. Transparent water tanks help you monitor levels at a glance, while top-fill designs can make daily refills easier.
Cleanliness isn’t just about hygiene—it directly affects flavor and reliability. Coffee oils and milk residue can clog components and change the taste of your espresso. A machine that’s easy to clean keeps both your drinks and your maintenance schedule in top shape. Simple interfaces and removable components are key for easy maintenance. Look for automatic cleaning cycles if possible.
Water Source Requirements
One of the biggest logistical considerations when buying an affordable commercial espresso machine is how it connects to water. Machines can be either pour-over (manual-fill) or plumbed-in (direct-connect). Pour-over machines have an onboard water tank that must be refilled by hand, while direct-connect models are hooked up to a water line for continuous use.
Pour-over machines are more flexible and portable, making them ideal for food trucks, carts, or events. They also require less setup and are often less expensive. However, they need frequent refilling, especially in busy settings, which can slow down service.
Direct-connect machines offer convenience for higher-volume operations, but they require access to plumbing and often need professional installation. They’re ideal for stationary cafés and commercial kitchens with high drink turnover.
Some models even allow dual-configuration—giving you the flexibility to switch between pour-over and direct-connect as needed. When considering your water source, also think about filtration. Using filtered water improves taste and prevents mineral buildup, which can extend the life of your machine. Some machines are direct-connect only (requiring plumbing), while others offer pour-over flexibility—ideal for mobile setups.
Size & Electrical Needs
Space and power are two often-overlooked considerations when purchasing an affordable commercial espresso machine. Machines range in size from compact single-group units to larger dual-group systems, so it’s essential to measure your available counter space before deciding. Also account for clearance above the machine if you plan to store cups or need access to refill a water tank.
Most commercial espresso machines require a 220V electrical line for optimal performance. Some smaller or semi-commercial units can run on a standard 110V outlet, but these models often have limited steam power and slower heat-up times. Always check voltage requirements and plug type before ordering to avoid compatibility issues.
Consider how close your machine will be to a water source (if it’s direct-connect), and leave room for accessories like grinders, knock boxes, and scales. A cluttered setup can slow down workflow and increase the chance of spills or mistakes.
If your machine requires hardwiring or special installation, it’s wise to factor in professional electrician costs. An affordable espresso machine that fits your counter and power supply out of the box will save time and money in the long run. Make sure the machine fits your countertop and matches your power supply—most need a 220V line.
🏆 Best Affordable Commercial Espresso Machines on Amazon (2025)
Disclosure: As an Amazon Associate I earn from qualifying purchases. This post may contain affiliate links.
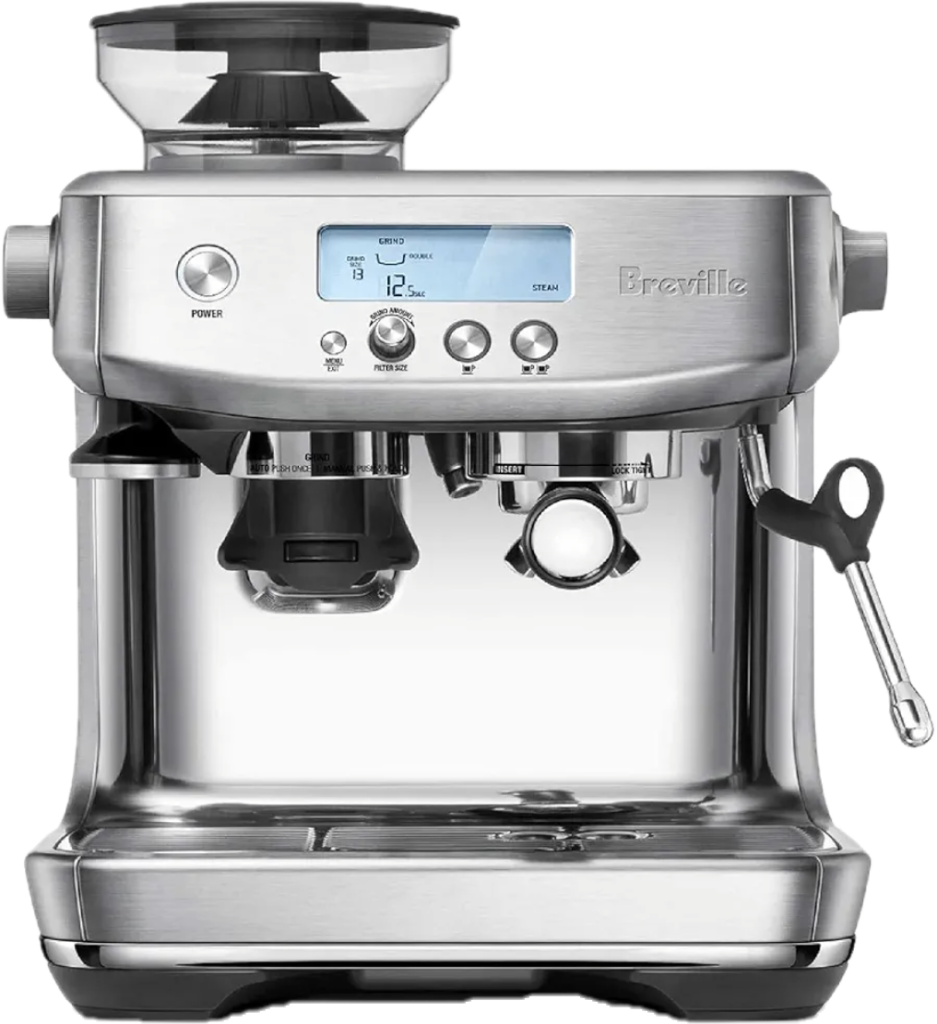
1. Breville Barista Pro Espresso Machine
⭐ 4.7/5 Stars | View on Amazon Why it stands out: An all-in-one espresso solution with fast heat-up and modern styling.
The Breville Barista Pro features a sleek brushed stainless steel finish and a built-in conical burr grinder for fresh grounds with every shot. The ThermoJet heating system allows the machine to be ready in just 3 seconds, making it ideal for quick morning service. The intuitive LCD screen shows grind size, shot timer, and more—perfect for beginner baristas and small setups.
Features:
Built-in conical burr grinder with 30 grind settings
ThermoJet heating system (3-second warm-up)
LCD interface with real-time feedback
Manual steam wand for latte art and milk drinks
Pros:
Easy to use for beginners
Great for small cafés or offices
Fast heat-up in 3 seconds
Cons:
Single boiler
Not suitable for high-volume operations
Best For: Boutique coffee bars, offices, prosumer use
2. Gaggia Classic Pro Commercial-Style Espresso Machine
⭐ 4.6/5 Stars | View on Amazon Why it stands out: A legendary entry-level machine with pro-grade internals.
The Gaggia Classic Pro comes in a brushed stainless steel body and delivers barista-level espresso for under $500. It features a commercial 58mm portafilter, a durable pump, and a powerful steam wand for cappuccinos and lattes. Known for its longevity, this machine is a favorite among entry-level espresso enthusiasts and small cafés.
Features:
Commercial 58mm chrome-plated brass portafilter
Durable brushed stainless steel frame
Commercial-style steam wand
Three-way solenoid valve for dry pucks
Pros:
Very affordable
Compact and durable
Great espresso quality with practice
Cons:
No programmable dosing
Manual operation only
Best For: Startups, home baristas, small café counters
3. De’Longhi La Specialista Arte Espresso Machine
⭐ 4.5/5 Stars | View on Amazon Why it stands out: Combines style and function for effortless espresso at a budget.
This matte stainless steel machine is compact and visually striking. The La Specialista Arte offers De’Longhi’s proprietary active temperature control and a built-in grinder with 8 grind levels. Its MyLatte Art wand is perfect for practicing milk steaming, and it includes premium accessories like a tamper, dosing funnel, and tamping mat.
Features:
Integrated burr grinder with 8 grind levels
Thermoblock heating system
Active temperature control
Includes barista kit for tamping
Pros:
Great design with intuitive controls
Consistent brewing for entry-level users
Compact for smaller counters
Cons:
Steam wand is less powerful
Requires regular cleaning
Best For: Coffee trucks, offices, small cafés with low traffic
4. EspressoWorks All-in-One Barista Bundle
⭐ 4.4/5 Stars | View on Amazon Why it stands out: A complete espresso starter set for the budget-conscious barista.
This matte black compact unit comes with everything you need to start making espresso out of the box—grinder, tamper, milk frothing pitcher, and even espresso cups. It features a thermoblock heating system for rapid warm-up and easy use. Though not designed for volume, it’s perfect for startups and small-scale service.
Features:
Complete 7-piece set including grinder and accessories
Thermoblock rapid heating system
15-bar pressure pump
Front-facing water tank
Pros:
Excellent value with accessories included
Beginner-friendly
Compact and portable
Cons:
Limited steam pressure
Not built for high-demand use
Best For: Coffee carts, offices, budget coffee startups
5. La Pavoni Europiccola Lever Espresso Machine
⭐ 4.5/5 Stars | View on Amazon Why it stands out: A timeless manual espresso experience with vintage Italian charm.
The Europiccola is a beautifully polished chrome lever machine that lets you take full control of your shot. With a brass boiler and spring piston system, this machine is built to last decades and provides the tactile feedback that espresso purists love. It’s compact, artistic, and perfect for a café looking to create a premium coffee experience.
Features:
Manual lever operation with piston pressure
Chromed brass boiler and base
Classic Italian styling with wood handles
Built-in pressure gauge
Pros:
Classic barista-style experience
Reliable build and heat retention
Long-lasting and eye-catching
Cons:
Steep learning curve
No automation
Best For: Artistic cafés, home use, manual espresso fans
✅ Final Thoughts
An affordable commercial espresso machine can absolutely deliver excellent espresso without breaking your budget. From semi-automatics with built-in grinders to manual lever classics, there’s an option here to match your workflow and startup scale.
Ready to get brewing? Choose the machine that best fits your expected volume, preferred level of automation, and space—and build your coffee dream without overspending.
If you’re opening a café, upgrading a restaurant setup, or looking to elevate your office coffee experience, choosing the right commercial espresso machine is a critical decision. The machine you select can directly affect speed, consistency, customer satisfaction, and barista workflow.
In this comprehensive guide, we’ll walk you through the best commercial espresso machines available on Amazon in 2025. Whether you’re a high-volume café owner or looking for a reliable automatic system for your office, these top-rated machines will help you deliver rich, high-quality espresso with ease.
🔍 What to Look for in a Commercial Espresso Machine
Before diving into product picks, it’s important to know what features separate a great commercial machine from a home espresso setup:
Brewing Capacity: Look for machines that can handle your peak volume.
Boiler Type: Dual or multi-boiler systems maintain stable pressure and temperature.
Automation Level: Choose between manual, semi-automatic, automatic, and super-automatic.
Durability: Stainless steel construction, high-quality components, and solid warranties are a must.
Ease of Cleaning: Time-saving cleaning cycles or accessible parts reduce downtime.
Water Source: Some machines require a direct water line, others are pour-over.
🏆 Best Commercial Espresso Machines on Amazon (2025 Picks)
Disclosure: As an Amazon Associate I earn from qualifying purchases. This post may contain affiliate links.
1. La Pavoni BAR-T 2V-B Commercial Volumetric Espresso Machine (2-Group)
⭐ 4.7/5 Stars | View on Amazon Why it stands out: A café-ready powerhouse with legendary Italian engineering.
The La Pavoni BAR-T 2V-B is a highly regarded commercial espresso machine known for its reliability and powerful boiler. It features a 14-liter copper boiler, independent group heads, and programmable volumetric controls for consistent shots every time.
Pros:
High-quality build with chrome-plated brass components
Handles peak periods with ease
Programmable dosing ensures shot consistency
Includes built-in water softener
Cons:
Requires professional installation
Higher upfront cost compared to entry-level machines
Consumer Feedback: Users rave about the machine’s durability and consistent shot quality. Baristas like the ergonomic steam wands and ease of use once programmed. Some noted that the size and complexity require space and training, making it ideal for serious operations.
Best For: Coffee shops, bakeries, and mid-sized restaurants
2. Nuova Simonelli Appia Life Volumetric Espresso Machine (2-Group)
⭐ 4.8/5 Stars | View on Amazon Why it stands out: Barista-friendly machine with excellent automation and performance.
The Appia Life continues Nuova Simonelli’s legacy of producing reliable commercial machines. The volumetric model offers hands-free shot pulling and a soft infusion system that reduces channeling and ensures even extraction.
Pros:
Energy-efficient model reduces utility costs
Built for ergonomic comfort during long shifts
Easy maintenance with automated cleaning cycle
Excellent milk steaming power
Cons:
Pricey for small operations
Requires a direct water connection
Consumer Feedback: Highly praised for shot consistency and ease of use. Café owners love the ergonomic design, fast workflow, and quiet operation. Some mention it takes up a bit more counter space than expected.
Best For: High-volume cafés, universities, and hotels
⭐ 4.6/5 Stars | View on Amazon Why it stands out: Commercial-grade automation in a countertop-friendly package.
The Oracle Touch is Breville’s flagship super-automatic machine, ideal for low-volume commercial environments. It automates grinding, tamping, brewing, and milk frothing—all controlled by a large intuitive touchscreen.
Pros:
Fully automatic operation with customizable profiles
Great for inexperienced users
Built-in grinder with precise dosing
Dual boiler system for simultaneous steaming and brewing
Cons:
Smaller capacity than full commercial models
Cleaning cycle is essential but time-consuming
Consumer Feedback: Beloved for its barista-level performance with minimal training. Offices and small cafés appreciate the consistent drink quality and touchscreen ease. Some users report issues with the auto-cleaning cycle if not maintained regularly.
Best For: Offices, small bakeries, coworking spaces
⭐ 4.5/5 Stars | View on Amazon Why it stands out: All-in-one espresso solution with built-in milk frothing.
The Gaggia Accademia is a polished, stainless-steel super-automatic espresso machine that fits well into upscale environments. With seven programmable drink options, a built-in ceramic burr grinder, and dual boilers, it’s made for simplicity.
Pros:
Excellent value for a super-automatic system
Intuitive LED interface with real-time feedback
Ceramic burrs reduce heat buildup during grinding
Automatic milk frothing with carafe
Cons:
Smaller bean hopper than other models
Steam wand is not manual (if preferred by baristas)
Consumer Feedback: Office users and boutique shop owners highlight how convenient it is for self-service. They love the programmable drink menu and milk carafe. Some mention it’s not ideal for high-traffic environments due to its slower brew time.
Best For: Executive offices, hotel lounges, boutique retail stores
5. Nuova Simonelli Musica Lux Espresso Machine with Programmable Dosing
⭐ 4.6/5 Stars | View on Amazon Why it stands out: Compact yet powerful option from one of the most respected names in commercial espresso.
The Nuova Simonelli Musica Lux is perfect for small cafés, boutique setups, or high-end home users who want a commercial-grade machine. It features programmable volumetric dosing, professional-grade steam power, and a heat exchanger system that allows simultaneous brewing and steaming.
Pros:
Sleek stainless-steel design with LED-lit trim
Programmable dosing for consistency
Powerful steam wand for milk-based drinks
Compact footprint for smaller spaces
Cons:
Single-group head limits volume output
Requires a separate grinder
Consumer Feedback: Users praise the Musica Lux for its reliability, sleek appearance, and ability to produce barista-quality drinks at home or in small operations. It’s especially loved for its fast warm-up time and smooth steaming capability. Some wish it included a built-in grinder, but say the performance makes up for it.
Best For: Boutique cafés, small bakeries, prosumer home users, catering setups
📊 Comparison Table: Commercial Espresso Machines at a Glance
Machine
Type
Boiler System
Automation Level
Best For
Amazon Rating
La Pavoni BAR-T 2V-B
2-Group Volumetric
14L Boiler
Volumetric (Auto)
Mid-size cafés
⭐ 4.7
Nuova Simonelli Appia Life
2-Group Volumetric
Heat Exchanger
Volumetric (Auto)
High-traffic cafés/hotels
⭐ 4.8
Breville Oracle Touch
Dual Boiler
Dual Boiler
Super-Automatic
Offices, boutique cafés
⭐ 4.6
Gaggia Accademia
Super-Automatic
Dual Boiler
Super-Automatic
Office lounges, low-volume
⭐ 4.5
✅ Final Thoughts
Selecting the best commercial espresso machine depends on your business type, budget, and desired user experience. Whether you want full barista control or streamlined automation, there’s an option here for you.
All of the machines in this guide are top-rated, available on Amazon, and built to deliver exceptional espresso at scale.
Still unsure which one’s right for you? Match the machine to your daily volume, user experience level, and space requirements—and you’ll be on your way to serving world-class espresso with confidence.
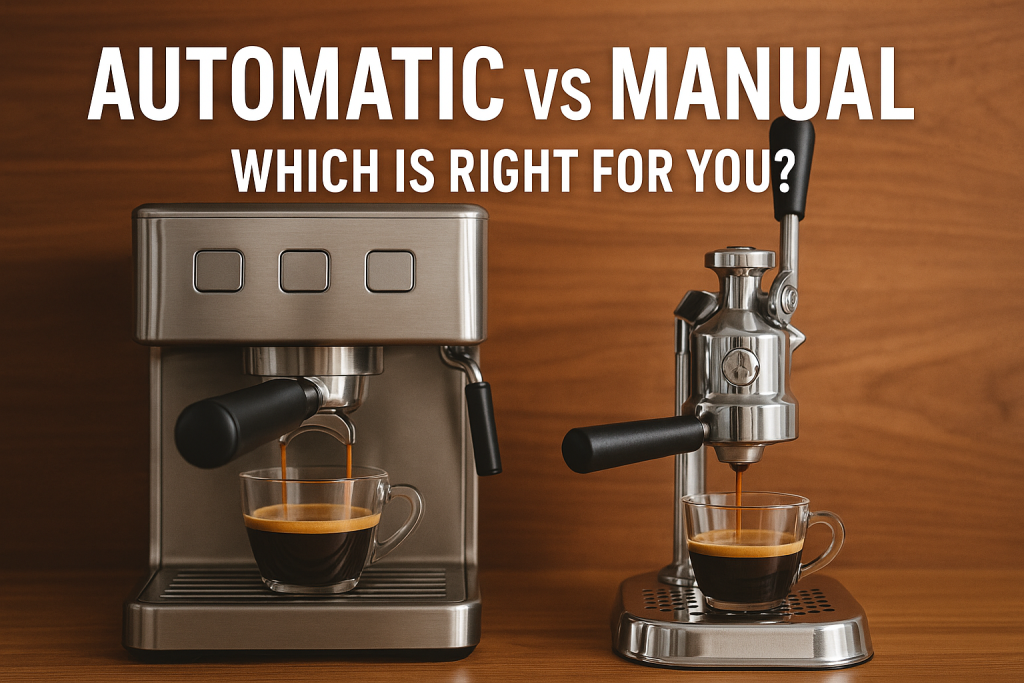
If you’re ready to start brewing espresso at home or for your business, choosing the right type of machine is one of the most important decisions you’ll make. The most common options are automatic and manual espresso machines, each offering different levels of control, consistency, and skill required.
In this guide, we’ll break down the pros and cons of automatic vs. manual espresso machines, explore their price ranges, and help you decide which one fits your lifestyle and coffee goals best.
🤖 What Is an Automatic Espresso Machine?
An automatic espresso machine (also known as a volumetric machine) uses programmed settings to control the water flow for extracting espresso. You press a button, and the machine dispenses a pre-measured amount of water through the coffee puck.
Types of Automatic Machines:
Semi-Automatic: User controls grind and tamping, starts and stops the shot manually
Automatic (Volumetric): Machine automatically stops the shot after preset volume
Super-Automatic: Fully automated — grinds, tamps, brews, and often self-cleans
Pros of Automatic Espresso Machines:
Consistency: Delivers uniform results every time
Speed: Quicker brew process, ideal for high-volume settings
Ease of Use: Great for beginners or staff with minimal training
Less Room for Error: Pre-programmed settings reduce user mistakes
Cons of Automatic Espresso Machines:
Limited Control: Less flexibility for dialing in your shot
Expensive Repairs: More complex internal components
Less Craft Involvement: May not satisfy coffee purists
Price Range:
Semi-Automatic: $300 – $1,200 (home use)
Automatic/Volumetric: $1,000 – $8,000 (home or small commercial)
A manual espresso machine, often called a lever machine, requires the user to control every part of the brewing process — including water pressure, shot timing, and volume. These machines are loved for their artistry and the hands-on brewing experience they provide.
Types of Manual Machines:
Spring Lever: Uses an internal spring to create consistent pressure when pulled
Direct Lever: Pressure is entirely user-controlled
Pros of Manual Espresso Machines:
Full Control: You adjust pressure, timing, and volume to match your coffee profile
Artisan Craftsmanship: The most rewarding experience for coffee purists
Beautiful Design: Often have vintage or elegant aesthetics that impress
Durability: Fewer electronic parts mean less maintenance risk
Cons of Manual Espresso Machines:
Steep Learning Curve: Requires time and skill to master
Inconsistent Results: Until you’re experienced, results may vary
Slower Brew Time: Not ideal for busy mornings or commercial settings
Price Range:
Entry-Level Lever Machines: $400 – $900
Premium Lever Machines: $1,000 – $6,000+
🆚 Automatic vs. Manual: Which One Should You Choose?
Choosing between automatic and manual espresso machines depends on your preferences, experience level, and how much time and control you want over the brewing process.
Ask yourself:
Do I want consistent results or room to experiment?
Am I brewing for myself or for guests/customers?
Do I enjoy the ritual and craft of pulling a shot?
Do I want speed and convenience?
📊 Comparison Table
Feature
Automatic Espresso Machines
Manual Espresso Machines
Ease of Use
High
Low
Learning Curve
Minimal
Steep
Control Over Brewing
Limited to Moderate
Full
Brew Time
Fast (under 1 minute)
Moderate (2–4 minutes)
Maintenance
More frequent, technical repairs
Simple, fewer parts
Customization
Limited by presets
Fully customizable
Price Range
$300 – $20,000+
$400 – $6,000+
Aesthetic Appeal
Modern, sleek
Vintage, artisan look
Ideal For
Beginners, offices, high-volume
Hobbyists, enthusiasts, purists
✅ Final Thoughts
If you’re looking for convenience, speed, and consistency, an automatic espresso machine is the way to go. It’s perfect for busy kitchens, offices, or anyone new to espresso who wants café-quality drinks at home.
On the other hand, if you love the hands-on process, value tradition, and enjoy the ritual of coffee preparation, a manual espresso machine delivers a rewarding and artistic brewing experience.
There’s no wrong choice—only what fits best with your brewing style, time, and passion for espresso.
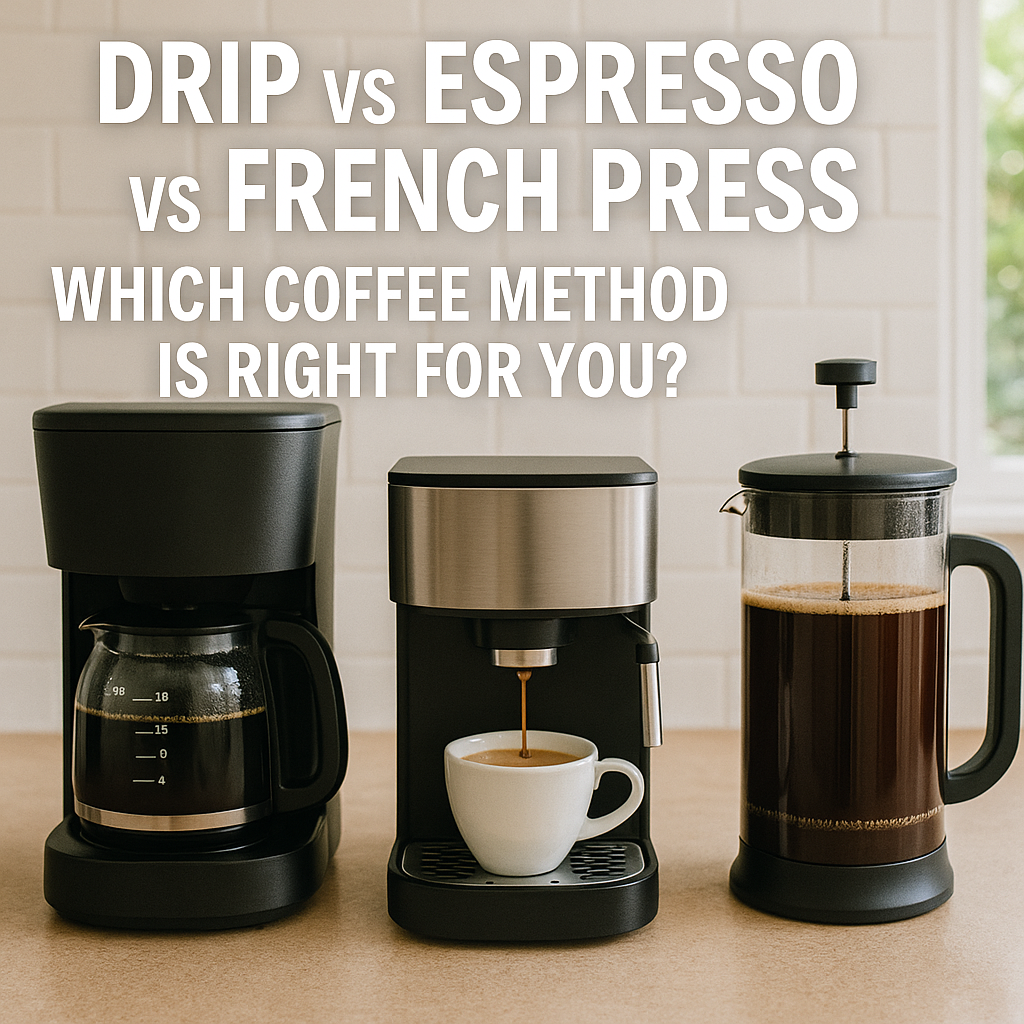
Choosing the right brewing method can transform your daily coffee ritual from a mundane task into a sensory experience filled with aroma, flavor, and intention. Coffee is not just a beverage—it’s a craft, a culture, and a lifestyle. With the multitude of brewing options available, it can be overwhelming to determine which method best suits your palate, time constraints, and equipment preferences. Whether you favor bold and intense flavors, a mellow cup to sip throughout the day, or a more hands-on ritual, there’s a brewing method that matches your unique coffee journey. In this deep-dive guide, we explore three of the most iconic and widely used methods: drip coffee, espresso, and French press. Each offers a distinct brewing process, flavor profile, and level of involvement. We cover everything from water temperature to grind size, extraction dynamics to pros and cons, so you can make an informed choice and elevate your brewing game with confidence.
☕ What Is Drip Coffee?
Drip coffee, also known as filter coffee, is the most common brewing method in North America and is often considered the workhorse of the coffee world. Found in households, workplaces, and cafes across the country, it’s cherished for its simplicity, consistency, and ability to produce several cups of coffee with minimal effort. While the technique is largely automated, the variables involved—grind size, water temperature, filter material, and coffee-to-water ratio—play a significant role in shaping the final taste. Some enthusiasts elevate drip brewing by incorporating manual methods such as pour-over, which provide more control and customization for those seeking a finer-tuned flavor experience.
How It Works
Drip brewing involves heating water to 195–205°F and evenly distributing it over medium-ground coffee housed in a filter—typically paper, cloth, or metal mesh. Gravity allows the water to flow through the grounds, extracting aromatic oils and soluble compounds before dripping into a carafe. In automatic machines, this process is managed by internal components, making it mostly hands-off. In manual pour-over methods, like Chemex or Hario V60, the brewer must control flow rate, bloom time, and pouring pattern, enabling a more tailored cup. The technique is straightforward but can yield exceptional results with quality beans and attention to detail.
Flavor Profile
Drip coffee produces a clean, clear, and balanced flavor with a lighter body compared to other brewing styles. Because the filter removes most oils and micro-particles, the result is a smoother, more refined brew. This makes it ideal for showcasing the delicate flavor notes of single-origin beans or lightly roasted coffees. While some may find it lacks the robustness of espresso or French press, drip coffee excels at subtlety and clarity. Roast profile, grind consistency, water quality, and brew time all influence whether the final cup leans floral, fruity, nutty, or chocolatey.
Grind Size
Drip coffee requires a medium grind, roughly the consistency of coarse sand or granulated sugar. Too coarse, and the water flows too quickly, leaving you with an under-extracted, sour cup. Too fine, and it can clog the filter and over-extract the coffee, resulting in bitterness. A quality burr grinder is crucial for consistent particle size, which helps achieve even extraction and balanced flavor. Some experimentation may be necessary depending on your machine or filter type.
Pros
Ease of Use: Drip coffee makers are user-friendly and require minimal involvement.
Batch Brewing: Capable of producing multiple cups in one brew cycle.
Affordability: A wide range of machines is available to suit all budgets.
Low Skill Requirement: Minimal technique needed to achieve a consistent cup.
Cons
Less Flavor Complexity: May lack the depth and richness of immersion or pressure-based methods.
Filter Limitations: Paper filters can trap oils and volatile aromatics.
Limited Customization: Most machines offer little control over key brewing variables.
Best For:
Busy households, shared office spaces, or anyone who values convenience, consistency, and quantity over experimentation. It’s the go-to method for straightforward, reliable coffee.
⚡ What Is Espresso?
Espresso represents the pinnacle of concentrated coffee brewing, a method born in Italy that has since become a cornerstone of global coffee culture. It serves not only as a potent standalone drink but also as the foundation for countless beloved café beverages such as lattes, cappuccinos, macchiatos, and Americanos. What distinguishes espresso from other methods is its intensity, complexity, and the level of precision required to achieve consistency. Brewing espresso is as much science as it is art, with even minor variations in grind size, water temperature, pressure, or tamping technique potentially altering the outcome. While the process can appear intimidating to beginners, it is a deeply rewarding experience for those who enjoy refining their skills and pursuing perfection in every cup.
How It Works
Espresso is brewed by forcing a small amount of nearly boiling water—typically around 200°F—through a compacted puck of finely ground coffee using high pressure, generally about 9 bars. This rapid extraction pulls out rich flavors, oils, and aromatic compounds in under 30 seconds. The process starts with dosing and grinding coffee to a fine consistency. The grounds are then tamped evenly into a portafilter, which is locked into the machine. When activated, the machine forces water through the puck to create a concentrated 1–2 oz shot, topped with crema—a creamy, golden foam that indicates freshness and quality extraction.
Flavor Profile
Espresso is renowned for its intensity and depth. It delivers a rich, syrupy body with a balance of acidity, sweetness, and bitterness. Common flavor notes include dark chocolate, toasted nuts, stone fruit, and spices, though the exact profile depends on the beans and roast. The crema adds texture and a slightly bitter contrast that balances the drink. Because of its strength, espresso is often diluted with water or milk to create other beverages while maintaining a strong coffee character.
Grind Size
Espresso requires a fine grind, comparable to powdered sugar. This increases surface area and resistance, which are crucial for proper extraction under pressure. Too coarse, and the shot will be weak and underwhelming. Too fine, and the machine may choke or produce an overly bitter brew. A quality burr grinder with micrometric adjustments is essential to dialing in the perfect grind.
Pros
Flavor Intensity: Captures the full spectrum of a bean’s character in a small volume.
Quick Brew Time: Great for fast-paced lifestyles.
Beverage Versatility: Serves as a base for numerous café-style drinks.
Skill Development: Appeals to enthusiasts who enjoy the process of perfecting their craft.
Cons
High Equipment Costs: Machines and grinders can be a significant investment.
Maintenance: Requires frequent cleaning and calibration.
Steep Learning Curve: Mastery takes time, practice, and attention to detail.
Best For:
Home baristas, espresso purists, and coffee lovers who appreciate a rich, full-bodied cup and enjoy diving deep into technique and experimentation.
🌿 What Is French Press Coffee?
The French press, also known as a cafetière or press pot, is one of the most iconic and beloved manual brewing methods. It’s favored by those who enjoy a slower, more hands-on approach to coffee preparation. Unlike drip and espresso methods, the French press is an immersion brew technique where coffee grounds steep directly in hot water, allowing for fuller extraction and a robust, earthy flavor. The absence of a paper filter means more oils and fine particles remain in the final cup, resulting in a heavier body and pronounced mouthfeel.
How It Works
To brew French press coffee, start by adding coarsely ground beans to the glass or stainless steel carafe. Pour in hot water just off the boil (about 200°F), ensuring all grounds are saturated. Stir gently and let the mixture steep for 4 to 5 minutes. Once brewed, slowly press the plunger down to separate the grounds from the liquid. The mesh filter allows the brewed coffee to pass through while keeping most of the grounds below. The process is simple but requires attention to timing and grind size to avoid over-extraction or excessive sediment.
Flavor Profile
French press coffee is rich, bold, and full-bodied. The oils and micro-particles that pass through the metal filter contribute to a more viscous and textured brew, often described as earthy or even chewy. This method is particularly good for highlighting chocolate, nut, and dark fruit notes found in medium and dark roasts. However, the lack of filtration also means that delicate floral or citrus notes may be overshadowed.
Grind Size
A coarse grind is essential, with a texture similar to cracked pepper or sea salt. Too fine, and the coffee will be over-extracted, gritty, and difficult to press. Too coarse, and the brew may taste weak or sour. Using a burr grinder will help achieve uniform particle size, which ensures even extraction and a cleaner cup.
Pros
Robust Flavor: Offers a strong, full-bodied cup that retains the bean’s natural oils.
Simple Equipment: No need for electricity or complex devices.
Eco-Friendly: Reusable metal filter and no disposable parts.
Portable: Great for travel, camping, or minimalist kitchens.
Cons
Sediment: Some fine particles may escape into the cup.
Cleanup: Grounds must be scooped and rinsed out manually.
Time-Sensitive: Over-steeping can result in bitterness if left unattended.
Best For:
Flavor-focused drinkers who prefer a more tactile and traditional approach. Excellent for weekend mornings, slow rituals, and those who appreciate texture and depth in their cup.
🔍 Head-to-Head Comparison Table
Feature
Drip Coffee
Espresso
French Press
Brew Time
5–10 minutes
25–30 seconds
4–6 minutes
Grind Size
Medium
Fine
Coarse
Equipment Cost
Low to Moderate
Moderate to High
Low
Flavor Strength
Mild to Medium
Very Strong
Medium to Bold
Body & Texture
Light and clean
Thick and creamy (crema)
Heavy, full-bodied
Skill Required
Low
High
Moderate
Servings per Brew
4–12 cups
1–2 shots
1–4 cups
Cleanup
Easy
Moderate
Moderate to Messy
Customization
Low
Very High
Medium
✅ Final Verdict: Which Brewing Method Should You Choose?
Your perfect coffee brewing method depends on your taste preferences, lifestyle, and how much effort you want to put into your daily ritual:
Choose Drip Coffee if you value convenience, consistency, and quantity. Ideal for shared spaces or mornings where speed and simplicity are key.
Choose Espresso if you’re passionate about bold flavors, enjoy milk-based drinks, and want to master a high-skill craft. It offers unmatched intensity and versatility.
Choose French Press if you enjoy a robust, unfiltered brew with depth and texture, and don’t mind a bit of cleanup. Perfect for slow, intentional coffee moments.
Still unsure? Many coffee lovers keep more than one method on hand and switch depending on the occasion or mood. No matter what you choose, investing time to understand your method, beans, and equipment will always pay off in the quality of your cup. Happy brewing!